Purpose:
This page is intended to fill an apparent gap in the online collection of knowledge on the Internet, specifically, how to take apart a "stock" Slot-1 SECC2 heatsink assembly (commonly found on Intel Pentium III processors) without trashing the heatsink in the process.
Disclaimer:
I am not an expert by any stretch of the imagination on PC hardware, proper handling of Intel equipment, etc. This information is provided solely for informational purposes. Do not attempt to repair or disassemble any part of your computer -- the processor and heatsink in particular -- unless you know what you are doing!!!
Background:
I recently picked up a pair of Pentium III 733MHz CPUs for my PC, which was at the time running with a pair of 533MHz CPUs. I assumed the upgrade would be a simple procedure of just swapping the heatsinks from the 533's to the 733's, but found that there was a problem -- the heatsink assembly for the Slot-1 SECC2 PIII setup did not seem to have an obvious set of screws or clamps for disassembling it. The whole assembly fit together rather tightly, actually, so it was hard to even get a peek inside to see how things fit together. After fiddling with it for about thirty minutes and checking with geek buddies who I thought might know the answer, I was still stuck; everything I tried to do to pry it open seemed to be dangerously close to snapping some important part of the assembly, so I gave up and decided to do some research rather than trash the heatsinks. I hopped onto Google to find out how to take them apart, and to my surprise (and dismay), after another thirty minutes spent searching the web I wasn't able to find anything really helpful; some slight references to these assemblies being prone to snapping when pulling them apart, and being a bad design, was all I could find. I eventually got brave and tried what I thought would work, and it did, but I damaged part of the assembly in the process. Oops.
So, this page is here to explain how these things can be pulled apart, and hopefully it will go up far enough in the Google search rankings that someone else who is stuck in the same situation I was can find it useful and save themselves a lot of wasted time and broken plastic.
Procedure:
Again, I cannot stress enough -- I am not an expert at this kind of hardware work, and unless you really know what you're doing, you should not be messing with your heatsinks or upgrading your CPUs yourself; it can lead to serious damage to the computer, and posible injury. Finally, this is intended as a guide to the specific "stock" heatsinks Intel uses on their Slot-1 PIII CPUs; you may have another make of heatsink, in which case this won't be much help to you at all.
What you will need:
Before you even start, be sure that the CPU you want to add is compatible with your motherboard, and if you have to make jumper settings to set the step rate for the new clock speed and voltage, write those down BEFORE you take the machine apart. If you're just upgrading the heatsink, this information isn't needed of course.
First, shut off your computer, remove the power cord, and open up the case so that you can remove the CPU in your machine. If you have a static mat or wrist guard, you should really use it since the parts you'll be handling are very sensitive to static discharge.
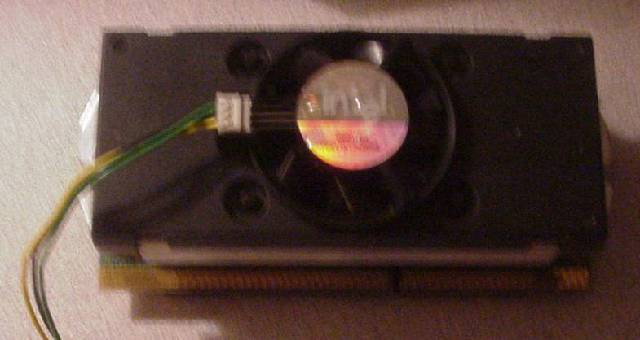
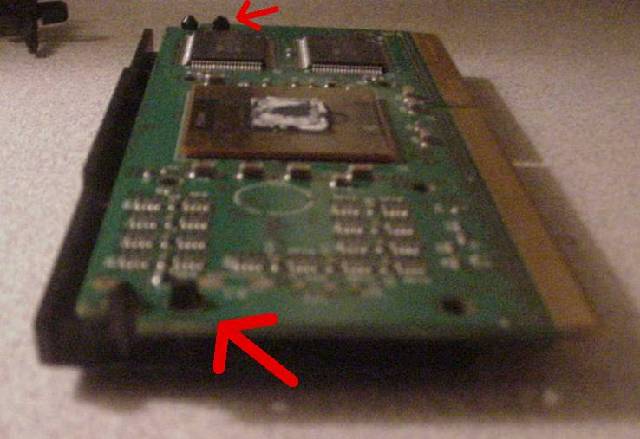
Remove the CPU/heatsink assembly from the slot; this will require loosening the clamps (slot guides) on either side of the CPU, to let the card slide out of the slot. You should have something that looks like this (sorry for the blurry images, I took them in a hurry :)
First, pop the fan assembly off of the top -- it's a simple pressure clip, and it will readily pull right off of the heatsink if you pull hard enough. If it won't come off, check for additional latches or clips. You will likely see four round plastic tabs coming up through holes in the fan assembly from deeper inside the whole thing -- ignore these. I know that they look like they should be pushed loose with needle-nose pliers, but they're really there just to help center the fan assembly; they aren't holding the fan onto the heatsink at all.
Now, there are two kinds of "stock" Intel Pentium III heatsink assemblies for Slot-1 CPUs. If you're lucky, yours has a metal tab that extends from one side of the fan and heatsink to the other, holding it tightly against the CPU card and backing. If this is the case, all you have to do is use a small screwdriver and (CAREFULLY) pop open the metal latch at the base of the heatsink on one side -- then release the matching metal latch on the opposite side, and you're done. Consider yourself lucky!
If, on the other hand, you have the lousy plastic-clamp design that I ran into, you will need to do quite a bit more work to get everything apart. At this point, you should be looking at the heatsink and seeing two long plastic clamps deep inside the ridges of the heatsink itself, each with two pegs that rise above the heatsink, and if you flip it over you'll see where they terminate on the black backing behind the CPU card. Looks like they need to be pinched with needle-nose pliers or something, don't they? Nope. It's not what it seems...
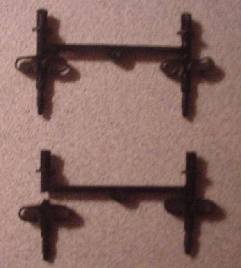
If you can by chance get a glimpse down the side of the assembly and see where the black pegs meet the CPU card, you may notice that the plastic pegs don't flare out at all -- in fact, it almost looks like they're threaded on the ends. Rather than being threaded, they terminate with a series of ridges that catch onto the black backing behind the CPU card, and that pressure keeps the heatsink snug against the CPU (and, because of the layout of the four of them, it also keeps the heatsink centered against the CPU card.) This is what the clamps actually look like (the bottom one is broken, something I'm going to help you avoid :) )
Now, the needle-nose pliers come into play. You have to be VERY careful and gentle with this, but at the same time you are going to have to exert a good amount of force to pull these things loose. You will need to use the needle-nose pliers to grab onto one of the pegs, and pull away from the heatsink in a straight line to pop it loose; wiggling from side to side may help a little, but really this comes down to pulling hard away from the heatsink.
What I found works best is to hold the heatsink with one hand, so that your index and middle fingers wrap around and lay on either side of one of the pegs -- this is to keep you from jerking the plastic "bridge" too far when the peg comes loose. If you just hold it with one hand and pull on one of the pegs with all your might with the pliers, the peg will suddenly come loose, and the other peg (which is attached by that "bridge" of black plastic) will snap free. Snapping the "bridge" is bad, but not catastrophic, so don't get too upset if you break it. However, even if you snap a peg off of the "bridge", you will still have to manage to extract it somehow, since it'll hold the assembly together otherwise.
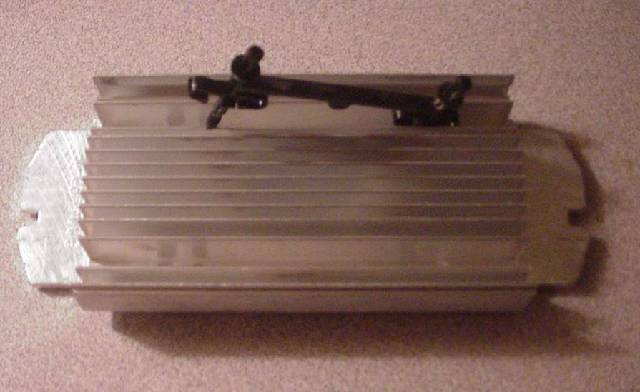
Here's what it should look like when you get one of the pegs free:
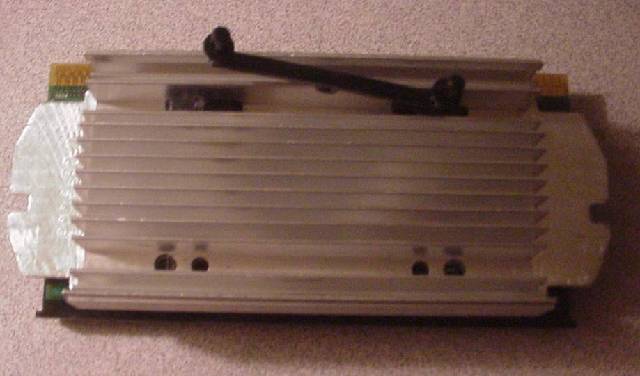
And if you snap one... (oops!)
Be careful when you pull the heatsink itself away from the CPU card, as there is bound to be some messy thermal paste on the CPU. You can wipe this off with a paper towel, at least any that's still gooey. You may find that a little force/twisting is needed to break the heatsink free from the CPU card, if the existing thermal paste has hardened. Be sure to make a note of which way the heatsink was oriented relative to the CPU card edge -- this makes a difference in how it fits into the slot guides on your motherboard!
If you made it this far, great -- you've done the hard part, getting those plastic pegs out. If you want to remove the black backing from the CPU card (not necessary, but again, this is all for informational purposes :) ), you have to squeeze a pair of flared plastic ends with needle-nose pliers to fit the connected peg back through the hole:
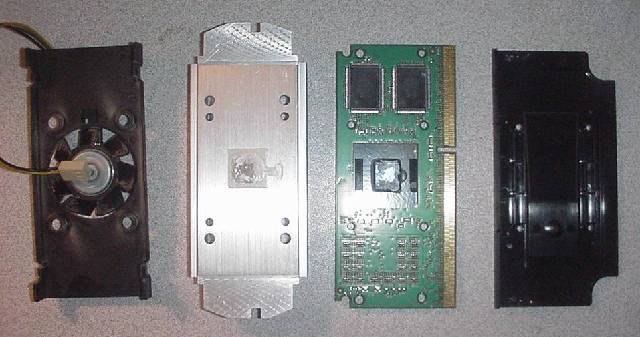
So, the whole disassembled thing will look like this:
If you have some compressed air handy, now's the time to use it. Chances are the fan and heatsink are quite dusty from running for hours on end. Might as well clean them while you have 'em out :)
Now you just reverse the steps to re-assemble the whole thing, swapping in your new CPU card and backing (you want to keep the backings with the CPU card they originally were paired with, since the CPU speed, etc. is printed on the backing.) Apply a small amount of thermal paste to the top of the CPU, spreading it evenly but very thinly. As I read in one webpage somewhere, "you're trying to get a thin layer of thermal paste that's free of air bubbles, not frosting a cake." Use the minimum amount necessary, since using too much can in some cases be worse than not using enough! If you spill some onto the CPU card, make sure you clean it up, as thermal paste is often conductive and it could cause a short-circuit.
Once the thermal paste has been applied, very carefully line up the heatsink with the holes for the clamp pegs, and press it onto the CPU card. Then, run the first clamp back through the holes, pushing it in just enough to make it snap once for each peg. You might be able to do this by hand, but if not, use the needle-nose pliers again to press the pegs into place. Remember not to slide the heatsink around too much, since you'll make a mess with the paste. Once one set of pegs is in, attach the other clamp, then press all four pegs all the way into the holes. If you look down the card lengthwise and can see any ridges that haven't pushed through, you need to force the pegs a little more; and you absolutely must be sure that the top of the CPU is making contact (with the thermal paste) with the bottom of the heatsink. If it's not, you need to tighten things down, or (possibly) apply more thermal paste. Finally, snap the fan back onto the top of the heatsink, lining it up with the guide pegs, and you're done!
Remember, when you pop the CPU back into your computer, you MUST be sure to set any necessary jumpers on the motherboard for voltage/step-rate before you turn the computer power on, or you could seriously damage it (and the CPU.) Also make sure that the slot-guides snap back against the CPU to hold it in place, otherwise shaking the machine may cause the card to shift, and damage the computer (or, at least, freeze up.)
Conclusions:
I hope that this proves to be helpful for someone else stuck in the same situation I was, and that it prevents accidental damage to innocent plactic heat-sink retention clamps. If I missed something important, or you know of a better way to approach this process, please let me know via email.